Make your own weapons
By Idiot/Savant
“I want to start larping, but weapons are too expensive. Can I make my own?”
People keep asking me this. The short answer of course is “yes”. The slightly more useful answer is “yes, but it probably won’t save you any money, unless you’re making a lot of them”. A basic sword costs ~$140 from Paddywhack (or $125 if you’re an NZLARPS member - and that discount is basicly most of your annual membership fee in one hit, so its worth joining NZLARPS just for that). The materials to get started making weapons will set you back about $100, and the weapons you produce will almost certainly be less durable and less pretty than anything you can buy for that price. OTOH, that $100 gets you enough stuff to make 4 - 6 weapons (depending on size). So, not worth it for one, but worth it if you want a lot of them to equip your friends, or quickly grow a local gear pool.
You do not need any artistic skill to make weapons - just time and the ability to cut a straight edge (and for that, you can use a ruler). If you have artistic skill, you can probably make something pretty. I wouldn’t know, because I don’t.
Safety standards
Before we get started, the most important rule: Make sure the weapon you are making is safe.
Safety standards vary by game. 33AR has its weapon safety standards in the back of its rulebook. I am not sure what Crucible does. Some games will check weapons for safety beforehand. If you want your weapons to pass such checks, at the minimum you need to make sure that:
- the core is not wood or metal
- the core is firmly part of the weapon, not flopping around loose inside it
- the core is sufficiently padded, so you’re not beating people with a stick of fibreglass.
What you need to do beyond that is going to vary, so ask your GM first.
What you need
- Fibreglass rod for cores
- Foam camp-mat ($17 for a 1.8 x 1m roll at the Warehouse)
- ADOS F2 contact cement ($20 for 500 mL from Mitre 10)
- Liquid latex
- A belt sander or vibrational sander
- Metal ruler
- Craft knives, and lots of spare blades
- Lots of foam brushes (get a couple of 10 packs from your local $2 shop)
- Acrylic paints: black and silver at minimum, plus dark brown, gold, and any other colours you want
- Lots of trays to put latex in. I chop the bottoms of 2L milk bottles.
- Leather or suede for grips
- Armour-all or spray-on varnish
- Scrap fabric
- A pen
- Hacksaw
- Leather gloves, breath mask, safety goggles.
- Bricks, a spare set of Britannicas, or something else you don’t mind using as weights.
- Space
A note on fibreglass: You can use other materials for your cores e.g. carbon fibre kitespars or tent-poles, but fibreglass rod seems to be the easiest to find. You can buy it individually at a farm supplies shop like RD1, or you can buy it in bulk over TradeMe (just search for “fibreglass fence-post”). It comes in two lengths: 1200mm and 1500mm. The shorter is good for maces and axes, because half a rod gives you a core of about the right length. The longer is good for basic swords. For longer weapons, you can cut it to length, but be careful with weapons over 1m long - fibreglass is quite flexible, meaning the weapon will be “whippy”. Which in turn means difficulties controlling it and a longer-term problem of the core de-laminating from the foam. If you want to make polearms, you will need to find a source of thicker cores.
Be careful when cutting fibreglass - the fibres are nasty and easily get into the skin. Wear good thick gloves, and a breathing mask.
A note on foam: the warehouse camp-mat varies a lot in its denisty, so check how hard it is. Generally I’ve found the brown to be too hard and the light grey to be too soft (meaning it tears when you try to cut it). Dark grey, blue or yellow seem to work fine.
A note on glue: Store your ADOS carefully. Its full of nasty organic solvents, which volatilise on warm days. If you leave it in direct sunlight (or, say, in the front seat of a car), the pressure will pop the lid off, possibly getting glue everywhere in the process. I store mine on a cool shady shelf to stop this from happening.
ADOS is contact cement - meaning that you apply a thin layer to each surface, then wait for it to dry. Once you press them together, the bond will be strong - so don’t make a mistake.
A note on paints: Some paints do not interact well with latex. I’ve had problems with one of the cheap black ones perishing my latex and turning it a dry and brittle grey. Unfortunately I don’t know which one it was, so be careful! Also avoid anything copper-based.
A note on space: You’re going to need a lot of it, and its going to get messy from ADOS, foam scraps, and latex. You’re also going to need to be able to leave sandwiches overnight under bricks, or hang weapons up while the latex is drying. A garage is perfect. A kitchen probably isn’t.
The basics
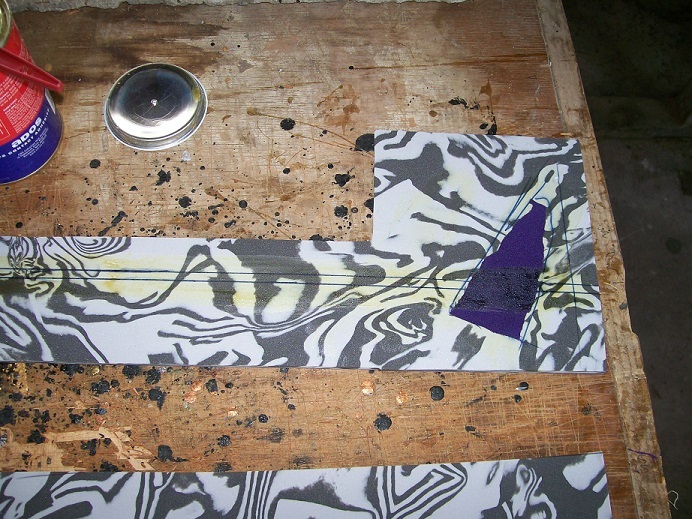
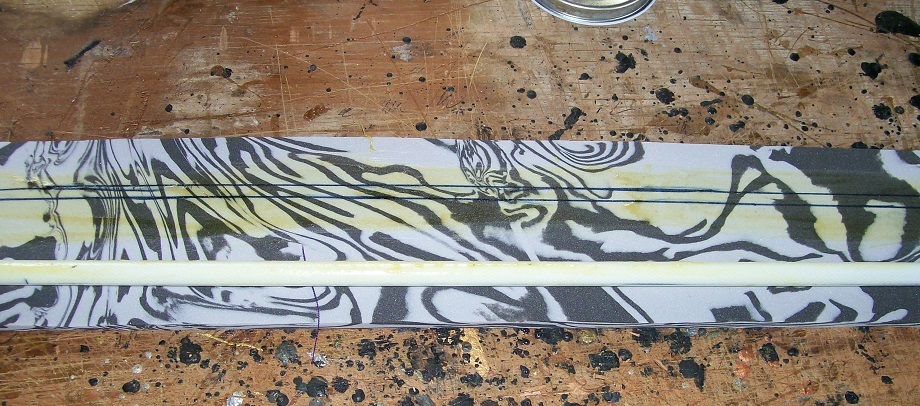
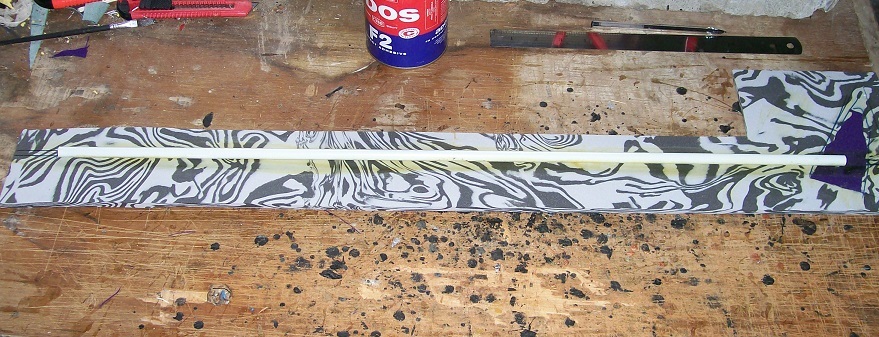
(Photos of this entire process are in the orc chopper example below)
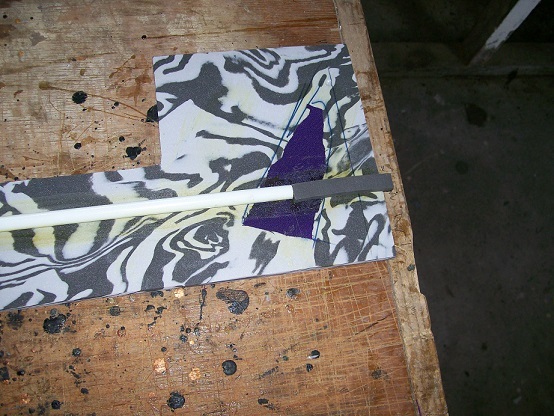
The basic method is the 3-layer sandwich.
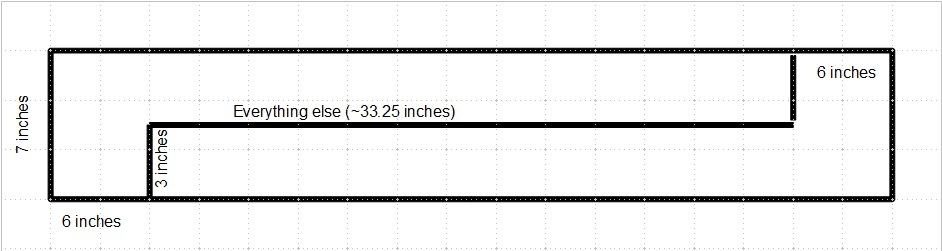
Work out what you’re going to make, and cut your core to the appropriate length. Work out how much foam the finished weapon will have over the core on each end and each side. Add 1.5cm / half an inch or so to each dimension as fudge factor. Cut three sections of foam to that size and stack them on top of one another. This will be your sandwich - all you have to do is get the core in there.
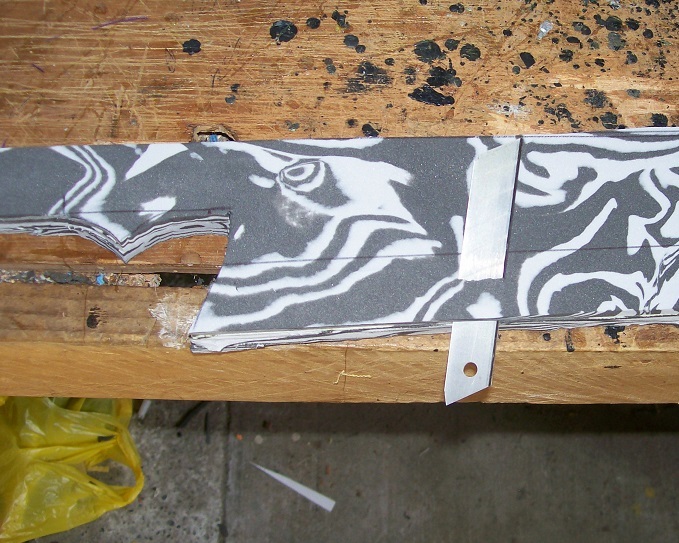
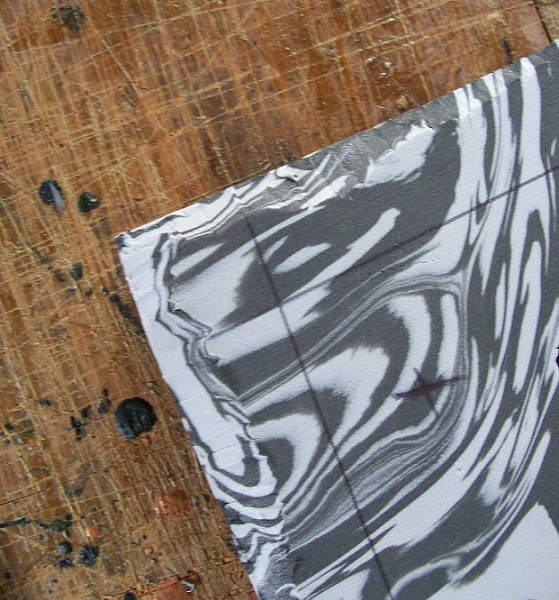
Start with the bottom piece of foam. Mark two lines on it: a centreline, and a line half a core diameter (0.5cm, assuming you’re using 1cm thick fibreglass rod) down from it. Place the core on the centreline and mark the ends. At the striking end, glue down a 2.5cm / 1 inch square of scrap fabric where the core will be (this is to prevent the core pushing through the foam in the event of an accident).
Repeat this process with the top sheet of foam, making sure you have it round the right way (alternatively, you can add your fabric to the middle; I prefer to do it on the top first).
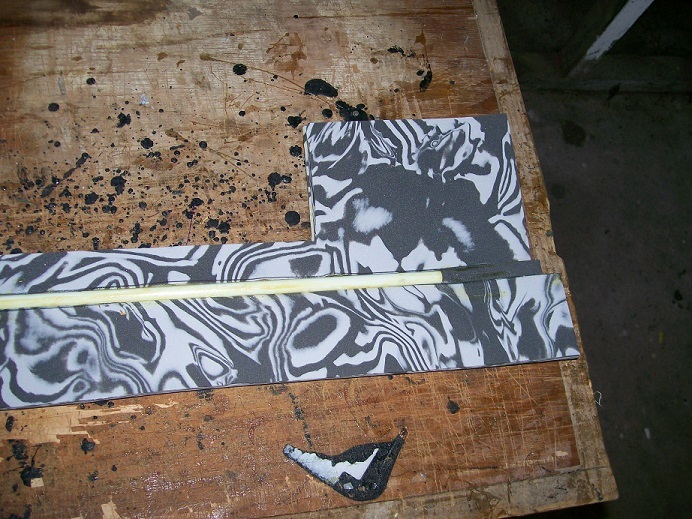
Mark a centreline on your middle piece of foam, and cut along it. Cut two small rods of foam 1cm wide to plug each end.
Now assemble it:
- First, paint a strip of ADOS along your centreline and along the core, wait for it to dry, then glue the core down.
- Second, glue in the end plugs (remembering to put glue on the ends and the core as well as the bottom of the plug). These should be lined up on one edge of the core, which should be just on that 0.5cm line.
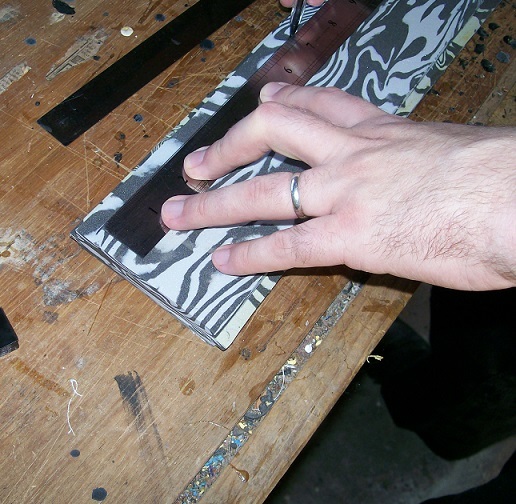
- Third, put in half the middle. ADOS that half of the bottom slab, that side of the core and end plugs, and a side and bottom of the middle slab. wait for it to dry, then carefully lay it down a bit at a time, bonding it to the core. Press down the outer edges once the core edge is done.
- Fourth, do the other half of the middle, again making sure it is well-bonded to the core.
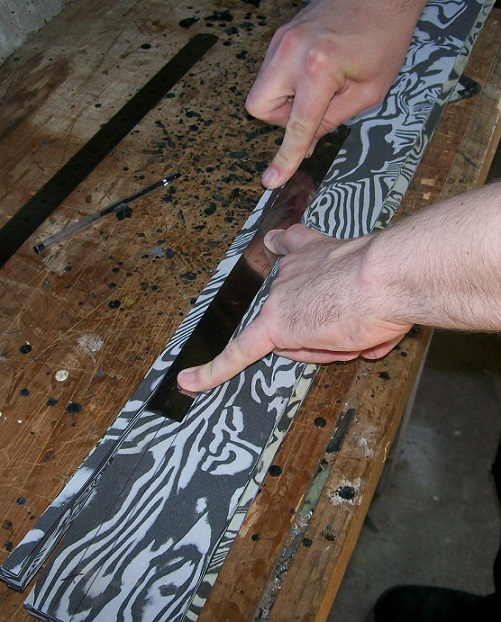
- Fifth, stick the top on. Press it down hard, give it a good pummelling to make sure everything is properly stuck together, and stick it under bricks overnight (or longer)
When you take the sandwich out from under the weights, feel the core and mark where the ends are. If the core feels at all loose or wobbly in there, strip all the foam off and start again. If its solid, then you can get on with cutting it to shape.
The process of making the sandwich takes about an hour from cutting the foam to getting it under weights. There’s a fair amount of waiting for glue to dry in there, so if you have space, try and work on multiple weapons at once.
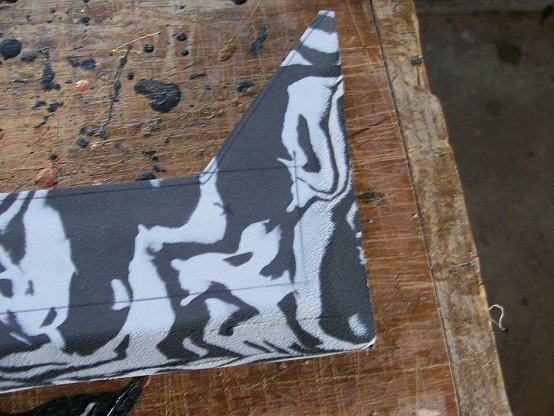
Specifics on how to make different types of weapons will be given below. But in general you’re making and shaping 3-layer sandwiches around a core; the rest is just detail.
If you want to add any decoration to your weapon - runes carved into the blade, appliques of foam to give additional texture - stick them on now. And pay attention to your latexing, because it will cover up some of the detail.
Latexing
Latex is the rubbery stuff on the outside which protects it from damage and makes it look good. When you buy it, its a thick white gloppy fluid which dries clear (or maybe a bit yellowish - I’ve used it to make guts before). You’ll need to paint enough coats of latex on to get a smooth, coloured finish.
There are lots of different opinions on how many coats you need and what colours they should be. This is just what works for me.
Dilution: As mentioned above, latex is quite gloppy. You’ll need to thin it down a bit with water. How much depends on how gloppy your latex is, but you want something about the same consistency as milk. Too thick and you’ll obscure detail and it will take longer to dry (OTOH, thicker latex = more protection).
Colouring: Most people don’t want their weapons to look like foam encased in yellowish transparent rubber, so you’ll need to colour your latex. You can use ordinary acrylic paints for this, the ones you get in a tube from Whitcoulls (Reeves student brand). I use black for undercoats (largely so I can see where I’ve painted), and a variety of silvers, browns, coppers and golds for topcoats. How much to put in is a bit of an art, and varies by how much you’re colouring. For undercoat, I do about a half jam-jar of latex, about a Tbsp of water, and a few squirts of black paint, until it looks battleship grey when swirled (this gives quite a thick and coloured mix). For top coats, I’m typically mixing them in a tray, and its usually a squirt of paint to ~20ml of latex.
Space: Latex is messy, so you don’t to do this in your living room. It also takes a lot of time - a dozen or so coats, and 0.5 - 2 hours for each coat to dry depending on temperature and humidity - so you need somewhere you can get messy. I use a garage.
Brushes: I use disposable foam ones from the $2 shop, and go through a lot of them. The smaller brushes are best, the big ones can be trimmed to size and the offcuts used for doing handles or small weapons. I expect to get 2 coats of latex out of a brush before having to chuck it. try and get the latex on smooth, and try not to put so much on that it forms dribbles or bubbles.
Drying: Just like paint, you don’t want anything to touch your latex while it is drying. For small weapons (e.g. throwing knives, small daggers) you can prop them up in flower pots. For bigger things, you’re going to need to hang them from the ceiling. I tie a strip of cloth around the end I’m not painting, and use string and bulldog clips to hang it. For the ends of big weapons (e.g. handles, axe-heads) I either wedge them upright, or hang them off the edge of a bench (with something on the other end to stop them falling).
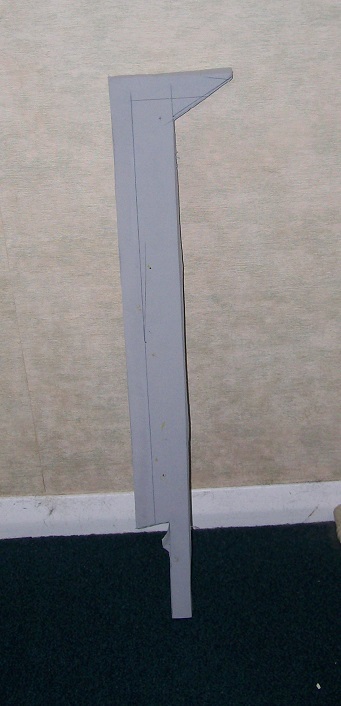
Undercoat: This is the basic protective coat. I use ~8 coats of black-tinted latex, which gives me a nice, gloss-black coating (which dulls over the next few days).
Top-coat: The coloured bit, usually 3 coats, colour depending on which bit you’re doing. For blades, I use silver mixed with black, increasing the amount of silver with each coat; to get a metallic look, you want it to go on a bit streaky. For blades that I want to look especially shiny, I switch from the usual Reeves student silver to Derivan metallic silver, and cut out the black. Gold can be done by similar methods. For wooden handles, I use a straight dark brown.
This gives fairly plain, blocky colours. As I said above, I’m not an artist. If you have a better technique to make things prettier, good on you.
Protection
Latex sticks to things - especially other latex - so once you’ve got your weapon latexed you need to protect it to stop this happening. There are a couple of options here:
Spray-on varnish: Seems to work OK. I’ve done a couple of axes with this, and had no problems
Armour-all: Yes, the stuff you use to make tyres and car-bits look shiny. Spray some on, work it around with a scrap of cloth, repeat as necessary. Will make the surface feel slick, but comes off inthe rain.
Talcum-powder: I’ve never done this, but apparently it works.
Finishing touches
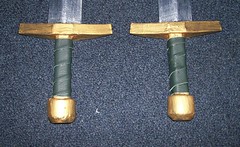
Once you’ve latexed and protected your weapon, you can add the finishing touches - leather grips, that sort of thing.
Grips: Use scrap leather of suede, either spiral wrapped or a big rectangular block. ADOS it down. String or additional leather to give texture or colour optional.
Lanyards: I find it best to stick a tag of leather under my grip when I first wrap it, then pass the lanyard through.